A smooth, durable asphalt surface is essential for any property, whether it's a quiet residential driveway or a busy commercial parking lot. A proper paving job not only boosts curb appeal but also ensures safety and longevity. But what exactly goes into transforming a patch of ground into a sleek, blacktop surface?
This guide breaks down the complete asphalt paving process, from the initial site preparation to the final touches. Understanding these steps will help you appreciate the craftsmanship involved and know what to expect when you hire a professional paving contractor for your project in Sanford, FL.
Before we get into the process, let's quickly cover what asphalt actually is. Asphalt, often called blacktop, is a composite material made from a mixture of aggregates (like crushed rock, sand, and gravel) and a binder. The binder is a sticky, black, and highly viscous liquid or semi-solid form of petroleum called bitumen.
When heated, the bitumen becomes liquid, allowing it to coat the aggregates. The mixture, known as hot mix asphalt (HMA), is then delivered to the job site, laid down, and compacted before it cools to form a hard, durable surface.
Achieving a long-lasting asphalt surface requires careful planning and execution. Professional paving contractors follow a multi-stage process to ensure the final product is stable, smooth, and built to withstand traffic and the elements.
The foundation is the most critical part of any paving project. A poorly prepared base will lead to premature cracks, potholes, and an uneven surface. This initial phase involves several key tasks:
Water is asphalt's biggest enemy. If water penetrates the surface or sits on top of it for extended periods, it can weaken the structure and cause cracks and potholes. That's why proper water drainage is a non-negotiable part of any paving job.
During this stage, contractors use specialized equipment to grade the sub-base, creating a precise slope. This slope, usually between 1.5% and 3%, directs water runoff towards designated drainage areas, like storm drains or the edges of the pavement. This careful grading is essential for the longevity of your asphalt surface, especially in a place like Florida where heavy rainfall is common.
With the sub-base graded and compacted, it's time to build the foundation. This is done by laying down an aggregate base, typically a layer of crushed stone. This base serves several important functions:
The aggregate is spread evenly and then compacted with a heavy roller to create a solid, interlocking foundation for the asphalt layers to come.
Now comes the part where the blacktop finally appears. The hot mix asphalt is transported from the plant to your Sanford property in specialized trucks designed to keep it at the right temperature (typically around 300°F).
The asphalt is applied in two layers:
A paving machine distributes the hot asphalt evenly across the entire area, ensuring a consistent thickness.
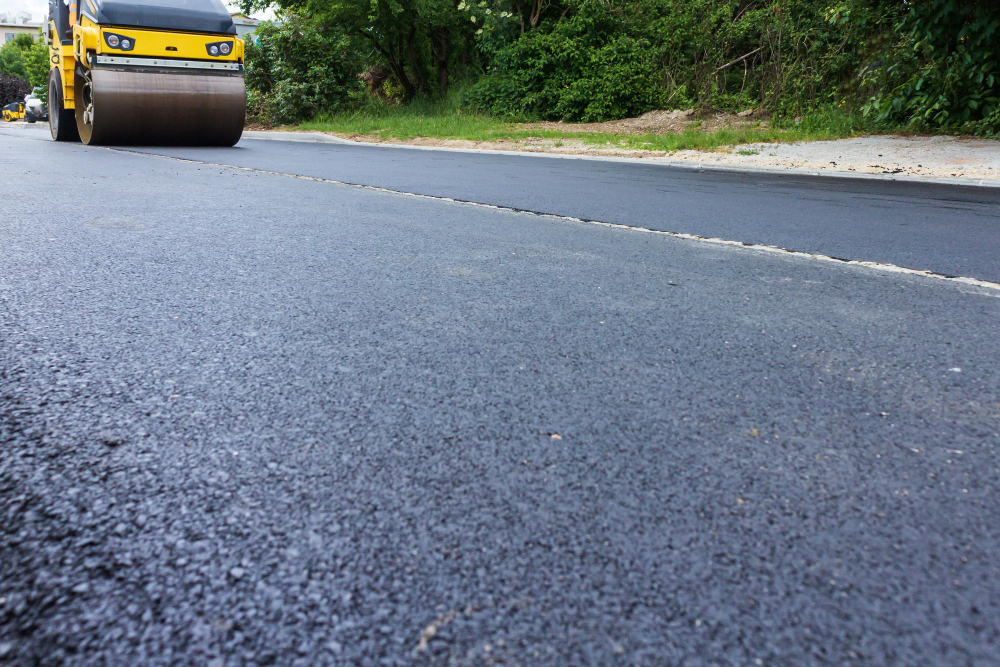
Immediately after the asphalt is laid, it must be compacted. This is a time-sensitive and crucial step. Compaction presses the aggregate particles together, increasing the density of the asphalt and creating a smooth, durable surface.
Contractors use a series of rollers, starting with a large, heavy-duty roller and finishing with a smaller, smoother one to iron out any marks. The rolling pattern is strategic, designed to achieve uniform compaction across the entire surface.
Once compaction is complete, the edges of the new pavement are smoothed to create seamless transitions to surrounding surfaces like sidewalks or garage floors.
The final step is to let the asphalt cure. The new surface needs time to cool and harden completely. This process typically takes 24 to 72 hours, depending on the weather. It's important to keep all traffic, including foot traffic, off the surface during this time to prevent dents and scuffs.
Once cured, a final inspection is done to ensure the surface is smooth, properly graded, and free of defects. Your new driveway or parking lot is now ready for use.
Asphalt paving is a complex process that requires specialized knowledge, equipment, and attention to detail. From preparing a solid foundation to ensuring proper drainage and compaction, every step is vital for a long-lasting result. Cutting corners at any stage can lead to costly repairs and a shorter lifespan for your pavement.
If you're in Sanford, FL, and need a new driveway, parking lot, or private road, trust the experts to handle it. A professional paving company has the experience and machinery to ensure your project is completed to the highest standards.
Ready to start your next paving project? Contact Florida Sealcoating today for a free, no-obligation estimate. Our team is ready to deliver a smooth, durable, and beautiful asphalt surface for your property.
Get a free, no-obligation estimate for your asphalt project. Our team is ready to help protect and enhance your property.
(407) 942-3681