A smooth, freshly paved surface not only boosts your property’s curb appeal but also ensures safety for vehicles and pedestrians. Whether you're installing a new driveway or resurfacing a commercial parking lot, understanding the asphalt paving process is key to achieving a durable and long-lasting result.
This guide breaks down the essential steps of asphalt paving, from initial site preparation to the final touches. By learning what goes into a professional paving job, you can make informed decisions and ensure your investment stands the test of time. We’ll walk you through each stage so you know exactly what to expect when hiring a paving contractor in Orlando, FL.
Asphalt paving is the process of applying a layer of asphalt concrete, also known as blacktop, to a surface to create a durable and smooth pavement. This material is a mixture of aggregates (like sand, gravel, and crushed stone) and a petroleum-based binder called bitumen. When heated, bitumen becomes liquid, allowing it to coat the aggregates. As the mixture cools, it solidifies into a strong, flexible surface ideal for roads, driveways, parking lots, and pathways.
The quality of an asphalt paving project depends heavily on the materials used, the preparation of the underlying base, and the expertise of the installation team. A properly executed paving job will result in a surface that can withstand heavy traffic, harsh weather conditions, and the test of time.
Professional asphalt paving involves several critical stages. Skipping or rushing any of these steps can compromise the integrity and lifespan of the pavement. Here’s a detailed look at how a professional paving project unfolds.
Before any new asphalt can be laid, the existing surface must be removed. This initial step, often called demolition, is crucial for creating a stable foundation. If the old pavement is cracked, crumbling, or uneven, paving over it will only lead to the same problems reappearing in the new surface.
Paving contractors use heavy machinery like front-end loaders and milling machines to break up and remove the old asphalt or concrete. This material is then hauled away for recycling or proper disposal. For projects in areas without existing pavement, this step involves clearing vegetation, rocks, and debris to prepare the raw land.
Once the old surface is gone, the focus shifts to the sub-base—the layer of soil underneath the pavement. This stage is arguably the most important part of the entire paving process. A weak or unstable sub-base will cause the asphalt above it to sink, crack, and fail prematurely.
Contractors use grading equipment to shape the land, ensuring it has the correct slope for proper water drainage. Water is one of asphalt's biggest enemies, and allowing it to pool on the surface can lead to rapid deterioration. The grading process creates a slight incline that directs rainwater away from the pavement and into designated drainage areas. This prevents water from seeping into the sub-base and compromising its stability.
After grading, the sub-base must be thoroughly compacted. This process removes air pockets and creates a dense, solid foundation capable of supporting the weight of the asphalt and the traffic it will bear.
A roller compactor is used to apply pressure across the entire surface until the sub-base reaches the required density. A well-compacted sub-base is essential for the longevity of the pavement. Without it, the ground can shift and settle over time, leading to an uneven surface and structural cracks in the asphalt.
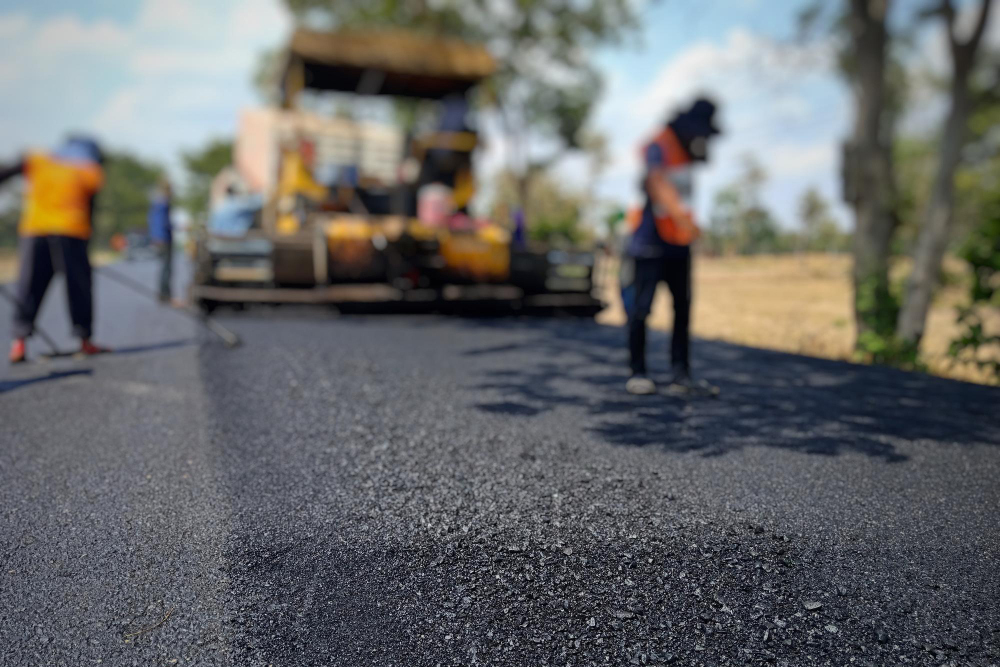
With the foundation set, it’s time to lay the asphalt. The hot mix asphalt is transported from a plant to the job site in insulated trucks to maintain its temperature. The paving process typically involves two layers:
A paving machine distributes the hot asphalt evenly across the prepared area, ensuring a consistent thickness throughout the project.
Immediately after the asphalt is laid, it must be compacted while it is still hot and pliable. A large roller moves over the fresh pavement, compressing the mixture to create a dense, smooth, and durable surface. This final compaction is critical for bonding the asphalt particles together and eliminating voids that could allow water to penetrate.
The contractor pays close attention to the edges of the pavement, creating smooth transitions to adjacent surfaces like sidewalks, curbs, or garage floors. These final touches ensure a professional and functional finish.
The last step is simply to wait. The newly laid asphalt needs time to cool and cure, a process where it hardens and gains its full strength. The curing time can vary depending on the weather, but it typically takes 24 to 48 hours before the surface can handle foot traffic. It’s usually recommended to wait at least 3 to 5 days before driving vehicles on a new asphalt surface. Your paving contractor will provide specific guidance based on your project and the local conditions in Orlando.
Once your new asphalt is fully cured, consider applying a sealcoat. Sealcoating is a protective layer that shields the pavement from UV rays, water, and chemicals like oil and gasoline. Regular sealcoating, typically every 2-3 years, can significantly extend the life of your asphalt and keep it looking new. It's a small investment that offers a huge return by protecting your larger paving investment.
Understanding the asphalt paving process helps you appreciate the skill and precision required for a high-quality installation. From meticulous site preparation to expert application and compaction, every step plays a vital role in the final outcome. Choosing an experienced contractor who doesn’t cut corners is the best way to ensure your new pavement is an asset to your property for years to come.
If you need professional asphalt paving in Orlando, FL, contact Florida Sealcoating today. Our team of experienced professionals is committed to delivering top-quality results on every project. We offer free estimates and are ready to help you with all your paving and sealcoating needs.
Get a free, no-obligation estimate for your asphalt project. Our team is ready to help protect and enhance your property.
(407) 942-3681